COMMITTED TO PROVIDE THE START-UPS AND OLD BRANDS WITH ALL THE SERVICES

Views: 0 Author: Site Editor Publish Time: 2025-12-18 Origin: Site


You are not the only one who has trouble finding pants that fit well. Look at this:
Evidence Description | Percentage |
|---|---|
Men having trouble with pants because of length and size | One-third |
Clothes sent back because they do not fit well | More than one-third |
This is why making your own custom pants feels great. This guide will help you make pants that fit your body and match your style. When you make your own pants, you get these benefits:
Pants fit you perfectly and feel comfy
You can pick your own style
You choose good materials
Pants work for many events
You feel more confident
Pants last a long time
If you need more help, Meiji Garment can help you with every step.
Making custom pants helps them fit you well and feel good.
Pick the best fabric for your style and event. This makes your pants look and feel better.
Good measurements are very important. Take your time so you do not make mistakes. This helps your pants fit right.
Try your pattern with a test fabric first. This helps you find problems before you cut your real fabric.
Add special things like pockets and closures. This lets you show your own style in your pants.
You want your pants to look nice and feel good. First, pick your fabric. Some fabrics are better for certain styles. Here is a simple guide to help you choose:
Trouser Fabric Types | Best For? |
|---|---|
Cotton | Cargo pants, Casual straight-leg trousers, Slim-fit pants |
Denim | Jeans like skinny, straight, and bootcut styles |
Corduroy | Warm straight-leg trousers, Relaxed-fit pants, Workwear pants |
Canvas | Utility trousers, Rugged cargo pants |
Silk | Palazzo pants, Wide-leg dress trousers, Evening pants |
Linen | Lightweight summer pants, Relaxed-fit trousers, Resort wear |
Rayon | Palazzo pants, Comfortable joggers |
Wool | Formal dress trousers, Suit pants, Smart-casual trousers |
Spandex | Skinny jeans, Activewear leggings, Slim-fit chinos, Tailored trousers |
Polyester | Activewear pants, Workwear pants, Travel pants, Dress pants |
If you want better fabrics, you can look at Meiji Garment’s services. They have many choices for every style.
Tip: Use a test fabric before cutting your good fabric. This lets you check the fit and make changes. You will not waste your best fabric.
You need the right tools to make pants. Here is a list to help you begin:
Sewing machine
Iron and ironing board
Extra bobbins
Zipper foot
Standard sewing machine needles
Needles for stretch and heavy fabrics
Fabric shears
Paper scissors
Thread snippers
Seam ripper
Hand sewing needles
Pins and magnetic pin holder
Transfer paper and tracing wheel
Tailor’s chalk or disappearing marker
Flexible measuring tape
Clear 18"x2" ruler
These tools help you cut, sew, and finish your pants easily.
Notions are small things that make pants strong and cool. Here are some extras you might use:
Fabric Type | Composition | Performance | Advantages |
|---|---|---|---|
Wool | 100% wool or blends | Insulation, breathability, moisture-wicking | Warmth, odor resistance, durability |
Denim | Heavy-weight cotton | Durable, molds to body | Comfort, versatile style, low maintenance |
Corduroy | Textured fabric | Soft, warm, slightly elastic | Soft texture, warmth, flexibility |
Nylon | Synthetic fiber | Lightweight, moisture-wicking | Easy to clean, resistant to fading |
You can add zippers, buttons, hooks, or elastic bands. These make your pants fit better and look nicer.
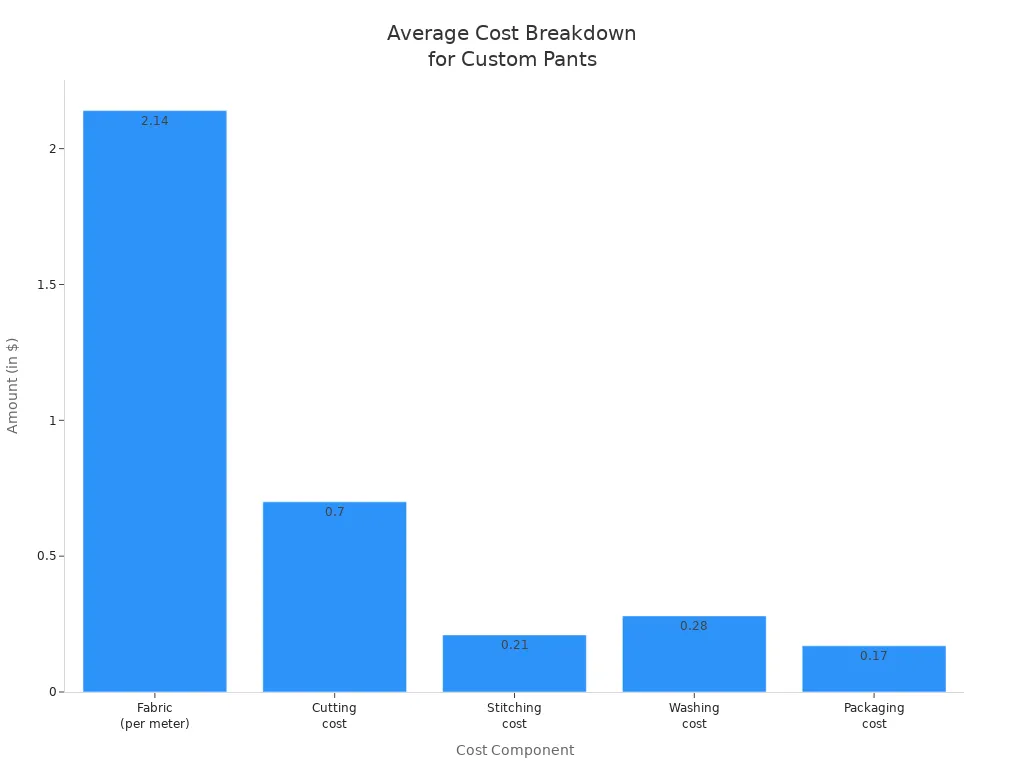
Making custom pants does not need to be expensive. You can start with simple tools and get more later.
You want your customized pants to fit just right. The first step in this step-by-step guide is to take your body measurements. Grab a flexible measuring tape and wear close-fitting clothes or underwear. Stand tall and look straight ahead. Ask a friend to help if you can.
Here are the most common mistakes people make when measuring for custom pants:
Measuring over thick clothing adds extra inches and makes pants too loose.
Pulling the tape too tight or too loose gives you the wrong numbers.
Slouching or standing unevenly changes your leg length and hip shape.
Stay relaxed and keep your feet flat on the floor. Write down each number as you go. You will need these body measurements for your basic pants pattern.
Measurement Type | Description |
|---|---|
Length Measurements | Waist to Low Hip, Waist to Crotch Level, Waist to Knee, Waist to Ankle |
Width Measurements | Hip Circumference, Waist Circumference, High Hip Circumference, Calf Circumference |
You need all seven body measurements for your basic pants pattern. Double-check each one before you move on.
Now you can start your basic pants pattern. You can draw your own or use a store-bought one and adjust it. If you want a truly unique fit, try making your own custom pants pattern from scratch.
Here is a simple way to draft a basic pants pattern:
Draw a horizontal line at the bottom of your paper. This is your ankle line.
Draw a straight line up from the center of the ankle. This is your crease line.
Mark your knee level with a horizontal line across the crease.
Keep drawing the crease line up.
Mark your crotch level with another horizontal line. Use your measurements to get this right.
Continue the crease line to the top.
Draw a horizontal line at your hip level. Make sure the distance from the crease line matches your body measurements.
When you adjust a basic pants pattern, keep the grainlines, center front, and center back straight. This helps your customized pants hang well. Use the adjustment lines on your pattern if you have them. Always change all matching pieces so everything fits together.
You can change your basic pants pattern for different body shapes. Here are some common shapes:
Body Shape | Description |
|---|---|
Inverted Triangle | Large bust or broad shoulders, narrow hips |
Triangle | Small bust or narrow shoulders, full hips or thighs |
Rectangle | Balanced top and bottom, little waist definition |
Hourglass | Balanced top and bottom, trim waist |
To adjust your basic pants pattern:
Fold out extra fullness to make an area smaller.
Slash and spread or overlap along pattern lines to make it bigger or smaller.
Redraw darts or seamlines for a better fit.
Add seam and hem allowances to your basic pants pattern before you cut your fabric. This gives you room to sew and finish your customized pants.
Tip: Meiji Garment offers OEM/ODM and private label services. If you want help with a custom pants pattern, their team can support you.
Before you cut your final fabric, test your basic pants pattern with a sample. This is called making a muslin or mock-up. Use a bottom weight fabric that is close to your final choice. Light-colored fabric helps you see fitting lines and changes.
Here are some tips for testing your customized pants:
Use the same type of fabric for your test and your final pants. This gives you a true fit and drape.
Pick a fabric that is heavy enough for pants. Thin fabric will not show the real shape.
Light colors make it easy to see where you need to adjust.
Testing with real fabric helps you spot problems that muslin might hide. Every fabric acts a little differently. When you use your final fabric, you can see how your customized pants will really fit.
Try on your test pants. Check the waist, hips, crotch, and legs. Pin or mark any spots that feel too tight or too loose. Make changes to your basic pants pattern before you sew your final pair.
If you want expert help, Meiji Garment can help you with custom pants pattern adjustments and fitting. Their team knows how to get the best fit for every body shape.
Now you have a basic pants pattern that matches your body measurements. You are ready to cut and sew your customized pants!
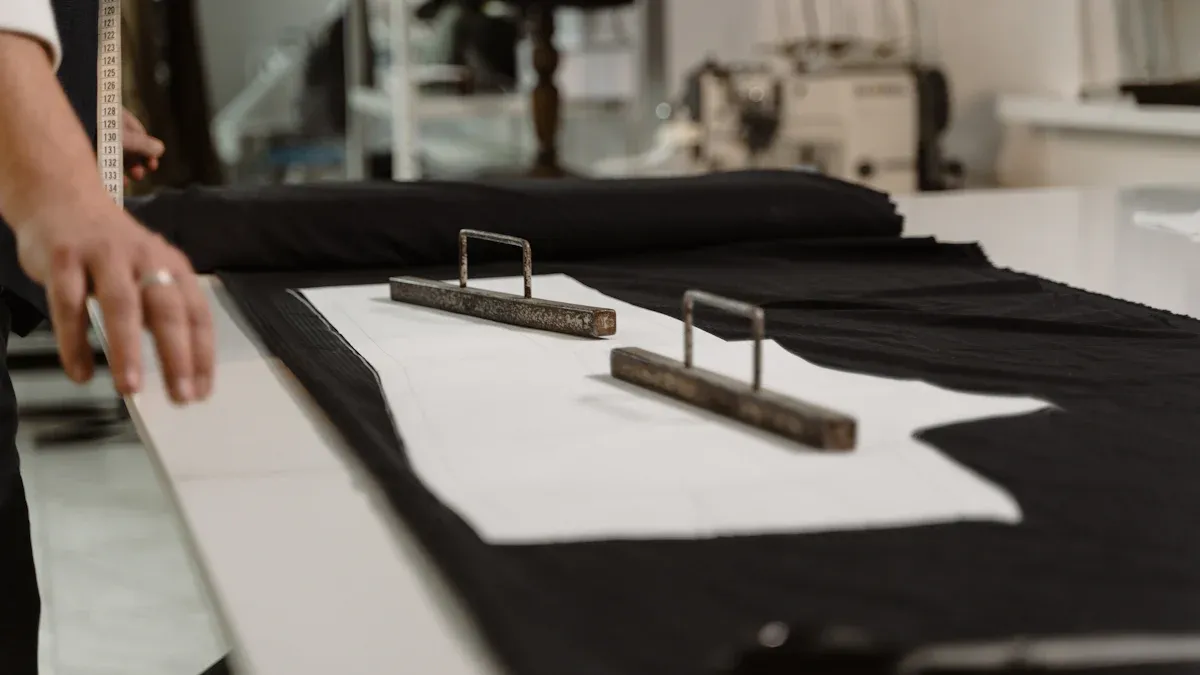
You want your custom pants to look sharp and last long. Start by preparing your fabric. Wash and dry it first. This step helps prevent shrinking later. Next, lay your fabric flat and smooth out any wrinkles. Make sure the edges line up. Check your pattern guide sheet and plan your layout. Place each pattern piece on the fabric, following the grain lines. If your fabric has a nap or one-way design, keep all pieces facing the same direction.
Here’s a quick checklist for cutting fabric:
Prewash or preshrink your fabric.
Review your pattern guide and layout.
Lay out pattern pieces as shown, following grain lines.
Pin or weigh down the pieces.
Cut carefully with sharp fabric shears.
Mark important points, like darts or notches, with tailor’s chalk.
Tip: Don’t skip washing your fabric. Skipping this step is a common mistake and can ruin your finished pants.
Now you get to sew your customized pants together. Start with the pockets if your design includes them. Sew inseam or patch pockets before joining the main pieces. For casual pants, sew the zipper and side seams first. Next, stitch the front and back crotch seams. Then, sew the outseams and inseams. Attach the waistband and finish with the hems.
For strong seams, use a lockstitch for woven fabrics. In high-stress areas, try a safety stitch for extra strength. If you’re new to sewing, elastic waist pants or wide-leg styles are easier to assemble and fit.
Note: Adjusting the front rise or adding a little extra room at the hips can make your pants more comfortable.
You can make your pants unique by adding different pockets, waistbands, and closures. Here’s a quick guide:
Pocket Style | Description | Ideal Occasions |
|---|---|---|
Slip Pockets | Shallow, sleek pockets along the waistband seams | Work, casual, evening |
Classic Side Pockets | Traditional side pockets | Everyday, casual |
In-Seam Pockets | Hidden in the side seams | Fitted, formal |
Patch Pockets | Sewn onto the outside | Casual, utility |
Cargo Pockets | Large, on the sides | Outdoor, workwear |
Welt Pockets | Narrow opening, tailored look | Formal, dress pants |
For waistbands, you can choose elastic for comfort or a tailored band for a polished look. Closures include zippers, buttons, hooks and eyes, snaps, or even Velcro. Pick what matches your style and skill level.
Try different pocket styles or closures to make your pants stand out.
Now you’re ready to finish your custom pants with confidence!
Now comes the exciting part—trying on your pants for the first time! Step into your customized pants and zip or button them up. Stand in front of a mirror and check how they feel. Do a few squats and sit down to see if they move with you. You might notice some common fit issues, such as:
Waist gap at the back or sides
Tightness in the thighs
Pants that are too long or too short
Rise feels uncomfortable or awkward
Fabric doesn’t drape as expected
Don’t worry if you spot any of these. You can fix most problems with simple adjustments. For example, if the thighs feel tight, add a little to the outseam. If you see horizontal wrinkles, adjust both inseams and outseams. For a saggy seat, decrease the crotch length. If the rise feels too short or too long, you can lengthen or shorten it. Pin out extra fabric at the back for a sway back. You can also scoop or straighten the crotch curve for a better fit. Take your time and make small changes until your custom pants fit just right.
A neat hem makes your pants look polished. Choose a hemming method that matches your fabric and skill level. Here’s a quick guide:
Technique | Best Suited For | Difficulty Level | Key Tools |
|---|---|---|---|
Machine Straight Stitch | Jeans, chinos, casual pants | Beginner | Sewing machine, matching thread |
Blind Hem Stitch | Dress pants, skirts, trousers | Intermediate | Sewing machine, blind hem foot |
Hand-Sewn Slip Stitch | Silk, chiffon, delicate fabrics | Intermediate | Hand-sewing needle, thimble |
Press your hems with an iron for a crisp finish. Add any final touches, like topstitching, belt loops, or decorative buttons. Try different details to show off your style. You can look at Meiji Garment’s collection for ideas on pockets, trims, and unique finishes. Your customized pants are now ready to wear and enjoy!
Tip: Don’t be afraid to experiment. Every pair you make helps you learn and express your creativity.
You can make your own custom pants with just a few steps:
Pick your fabric for the season and purpose.
Choose a style that fits your look.
Personalize your design with patterns or accents.
Measure carefully for a great fit.
If you run into problems, try these tips:
Blend sizes for a better fit.
Make a quick muslin to test.
Adjust width and crotch length as needed.
Check out these popular options from Meiji Garment:
Customization Option | Description |
|---|---|
COMPLETELY CUSTOM (OEM&ODM) | Full design to finished product support. |
PRIVATE LABEL | Add your own brand and logo. |
CUT AND SEW | Help with cutting, sewing, and samples. |
PERSONALIZED SUPPORT | Friendly service and unique results. |
Have questions about making customized pants? Share your creations or ask for advice in the comments!
You can jump right in with a simple tutorial. Start by reading an interactive tutorial. This will show you each step. You can decide on the style you want. Follow the tutorial for measuring, cutting, and sewing. Try an interactive tutorial for extra help.
You can use a tutorial to learn about fabrics. An interactive tutorial will show you how to pick the right one. Look for comfort and durability. The tutorial will help you match fabric to your style. Try an interactive tutorial for more tips.
Yes, you can! A tutorial will guide you through easy fixes. Use an interactive tutorial to see where to add or remove fabric. The tutorial will show you how to pin and adjust seams. Try an interactive tutorial for step-by-step help.
You can follow a tutorial for adding pockets. An interactive tutorial will show you different pocket styles. The tutorial will help you sew them in place. Try an interactive tutorial to see pictures and videos. You can make your pants unique.
You can look for an interactive tutorial online. Many tutorials have videos and pictures. You can ask questions in the comments. Try a tutorial from Meiji Garment for expert tips. An interactive tutorial will answer common questions and show you what to do next.


